How to Tie a Bowtie

Some things are worth learning the right way. Tying a bowtie is one of them.
Whether you’re heading to a formal event or preparing to be the one groomsman who can help everyone else, knowing how to tie a bowtie by hand is a subtle skill that speaks volumes. And while it may take a few tries to get right, the result is well worth the effort—a sharp, and maybe slightly imperfect knot that says you’re better than a clip on.
Here’s the simple answer: to tie a bowtie, start by draping it around your neck with one end slightly longer than the other. Cross the longer end over, loop it through the middle, then shape one side of the bow. Fold the other end and push it through the back loop to finish the knot. Adjust the bow until it looks just right—clean, confident, and slightly imperfect in all the right ways.
If you need each step broken down (we did), here’s your guide on how to tie a bowtie the Mizzen+Main way: straightforward, functional, and timeless.
Prep First
Before you begin, button your shirt to the top and flip up the collar. Good lighting and a decent mirror will help. Take a deep breath, maybe sip a cocktail. We’re neither rushing nor dragging.
Step 1: Set Your Length
Drape the bowtie around your neck so the right side hangs a few inches longer than the left. If it helps, imagine each side of the bowtie as a fish: the oval is the body, and the triangle at the end is the tail. The bottom of the short end should line up with the middle of the body of the longer side.
Step 2: Make the First Knot
Cross the longer end over the shorter, then loop it underneath and pull it through the center—just like the first step in tying your shoes. Make sure the loop around your neck feels snug but not tight. You won’t be able to adjust it later.
Step 3: Build the Bow
Let both ends hang down evenly. Take the end that’s on top and toss it over your shoulder. With the bottom end still in front, fold the body in half horizontally to form the front shape of your bowtie. Hold that fold in place with one finger. Now bring the top piece back down over the center. You should see the “tail” of your fish hanging below.
Step 4: Thread the Loop
Here’s where we earn our style. It’s tricky but you got this. With one hand, pinch both sides of the bow together. You’ll notice a horizontal loop forming behind. Take the loose end hanging vertically, fold it in half, and push that fold through the loop behind the bow. If you’ve done it right, you should have a rough bow taking shape.
If it falls apart, don’t worry. Everyone starts here. Reset and try again. This is the part that separates a pre-tied look from a practiced hand.
Step 5: Shape and Finish
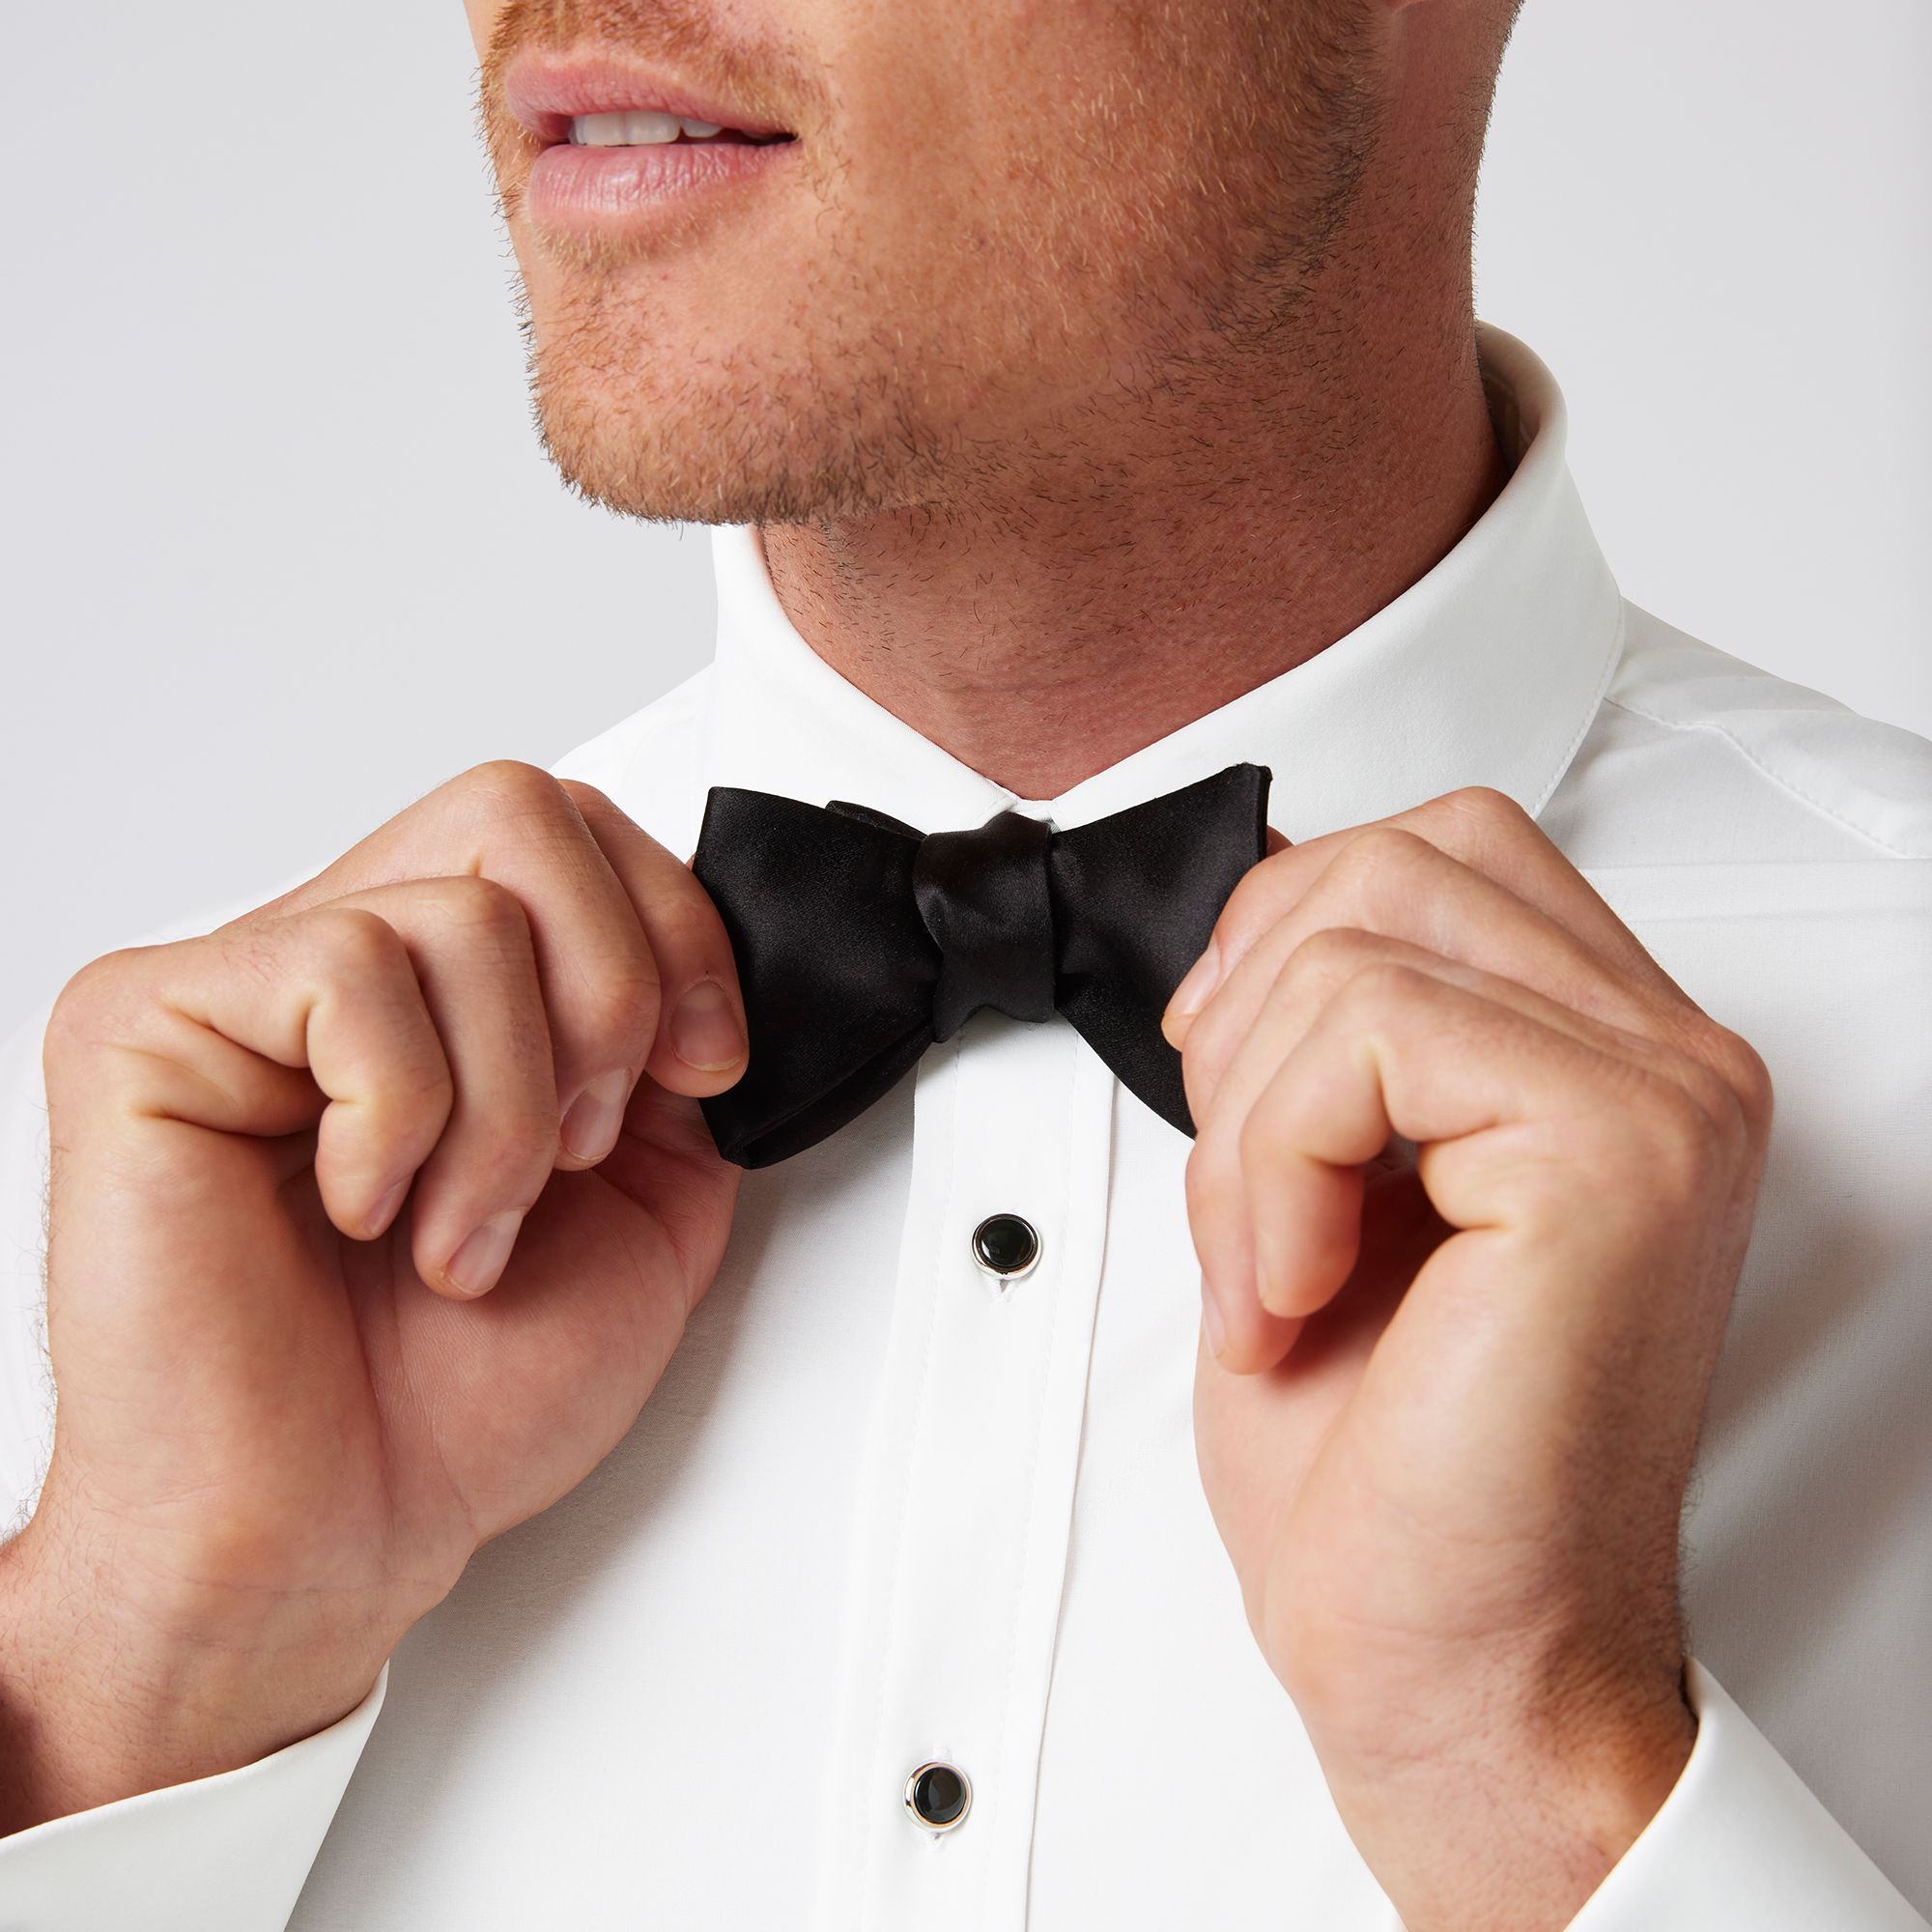
The first knot is never perfect—and that’s a good thing. Tug gently on opposite ends to tighten the knot and shape the bow. You’ll want to alternate between pulling the single-layer triangles and the double-layer loops until the bow feels balanced and secure. A little asymmetry adds character.
Once it looks the way you want, flip your collar back down so it covers the band. That’s it—you’ve just mastered how to tie a bowtie.
Final Tips
To untie, just pull on one of the single triangle layers, and the whole thing will come apart.
If it’s not perfect? Even better. A bowtie tied by hand has personality. Practice makes polished. The more you do it, the faster and cleaner it gets.
Knowing how to tie a bowtie is more than a party trick—it’s a classic skill that complements a sharp shirt and adds timeless style. If you’re looking for the right shirt to pair it with, start with our performance fabric dress shirts. Designed to move with you and look sharp all day.
Jonny Wills is the Creative Director for Mizzen+Main where he leads creative strategy while still doing his first (and favorite) job—writing copy. And for the record, he put that em dash there all by himself.